
Unveiling the Power of Pumpkin Seeds
Hey there, fellow foodies and intrepid kitchen adventurers! Ever wondered what’s the deal with those little morsels left over after a pumpkin carving session? Well, let me tell you, pumpkin seeds are not just for spookin’ up your Halloween – they’re nutritional powerhouses and culinary chameleons, too! 😲
Nutritional Profile Breakdown
First off, these tiny titans are jam-packed with nutrients. They are a fab source of magnesium, which is great for your pumper – I mean, your heart. They’ve got zinc (hello, immune system booster!), and a decent helping of plant-based omega-3s. And let’s not forget about the protein; these seeds are like the muscle cars of the snack world. 💪
Culinary Uses and History
So where did these little gems get their start? Culinary historians suggest that pumpkin seeds, or “pepitas” if you’re feeling fancy, have been used in cooking for ages. From being ground into sauces in traditional Mexican cuisine to being sprinkled on top of your morning granola, these seeds have versatility in spades. Oh, and if you haven’t tried pumpkin seed butter yet, you’re missing out on some creamy, nutty goodness!
Varieties of Pumpkin Seeds
Did you know that there’s a whole world of pumpkin seeds out there? You’ve got your regular ol’ seeds that come from your jack-o’-lantern varieties, sure. But then there are the Styrian seeds, rocking a dark green color and hailing from Austria – they’re kinda like the deluxe version in the pumpkin seed world.
Well, now that we’re all pumped about pumpkin seeds, let’s gear up for the next step – preparation. You don’t just want to dive in willy-nilly; there’s an art to selecting and prepping your seeds that’s gonna make all the difference in the oil we’re aiming to craft. So, stay tuned, ’cause we’re about to get our hands a little dirty – and trust me, it’s gonna be a hoot! 🎃
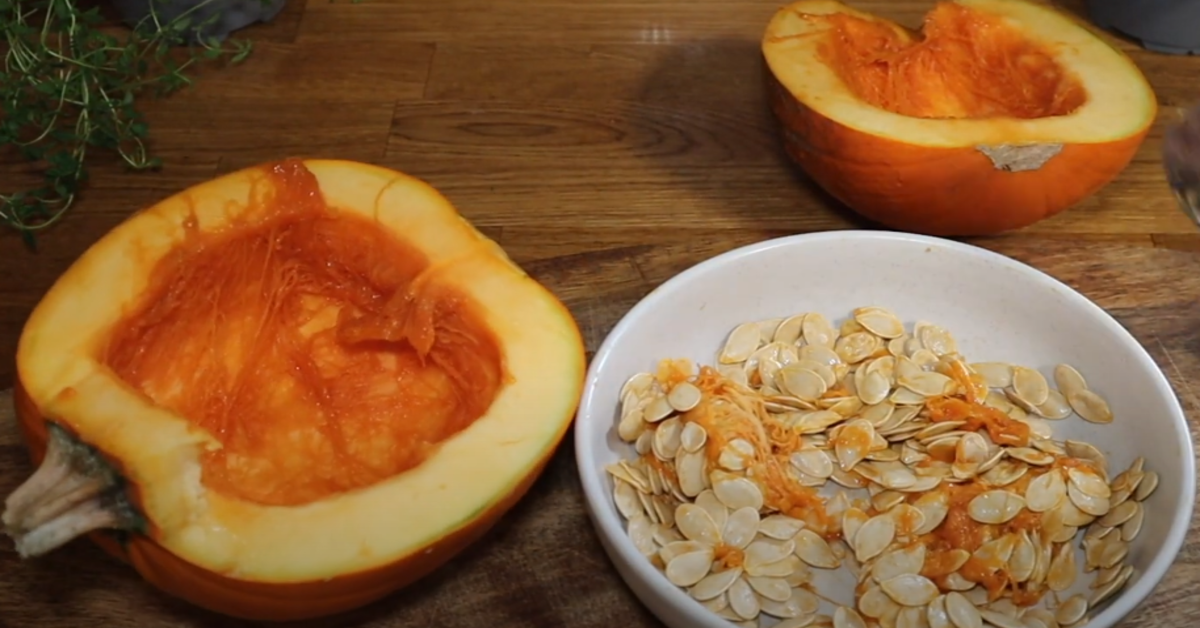
Preparing Your Pumpkin Seeds
Alright, folks, let’s roll up our sleeves and get down to the nitty-gritty of prepping these bad boys. You know, pumpkin seeds. I’m not just talking about yanking them out of your jack-o’-lantern and giving ’em a once-over with a paper towel. We’re aiming for the crème de la crème here!
Selecting Quality Seeds
First things first, you gotta be picky about your seeds. Look for plump ones, those that feel like they’ve been hitting the seed gym, you know? Size matters here, folks – bigger seeds mean more oil, and we’re in it for that liquid gold. Of course, don’t get duped by looks alone; fresh is the name of the game. If they smell off or look like they’ve seen better days, toss ’em. Your oil’s only as good as the seeds you press.
Cleaning and Drying Methods
- Wash ’em good: Pumpkin guts be gone! Rinse those seeds thoroughly to ditch any stringy bits.
- Dry ’em out: Patience, my friends. Lay the seeds flat and let them air-dry like they’re sunbathing in the Bahamas.
Roasting: A Flavorful Decision?
Now, here’s where things get heated – literally. Roasting isn’t just for turkeys, folks. Those seeds? Give ’em a quick toast, and you’ll elevate their flavor to superstar status before they even hit the press. But keep an eye out; we’re not looking for charred seeds of sadness. A golden brown, that’s your ticket to Flavortown.
Stick with me, ’cause next up, we’re diving headfirst into the toasting seeds to perfection zone. It’s gonna be like a backstage pass to the best aromas in town, and I can’t wait to show you how it’s done. Grab your oven mitts – things are about to get toasty! 🎃
Toasting Seeds to Perfection
Ever wondered what turns a humble pumpkin seed into a flavor-packed powerhouse? Well, folks, it’s all in the art of roasting. You see, toasting your seeds is kinda like turning up the volume on your favorite tune – it brings out the richness that’s been hiding in plain sight!
Now, don’t just throw those seeds in the oven and hope for the best. Nah, finding the Right Temperature Balance is crucial. You’re aiming for a toasty brown, not charred black, capiche? You’ll want that oven preheated to just the right spot – somewhere between 300-350°F (150-175°C). That sweet spot, my friends, is where magic happens.
- Finding the Right Temperature Balance: Start low and go slow, as I always say. Begin with the lower end of the temp range and keep a keen eye on your seeds. You’re looking for a golden brown, not an ashtray special.
- Timing Your Toast for Perfection: Set those timers, but use your nose, too. Those seeds should take about 10-15 minutes, but who knows? Your oven might be hotter than a Fourth of July barbecue. Give ’em a shake halfway through to ensure even toasting.
And then, let’s not forget, once those babies are out of the oven, we gotta Let’s Cool It. I mean, literally cool it. Spread ’em out on a baking sheet and let them chillax to room temp. This isn’t just about not burning your fingers; it’s science, people. Cooling helps to lock in that nutty aroma and makes sure the oil press gets every last drop of goodness.
So there you have it, the secret handshake of the pumpkin seed toasting club. Get these steps right, and you’re on your way to the best pumpkin seed oil of your life. And hey, just when you think you’ve mastered the art of the roast, wait ’til you see what’s next – The Art of Pressing Pumpkin Seeds. Stick around, the journey to liquid gold is about to get even more exciting!
The Art of Pressing Pumpkin Seeds
So you’ve roasted your pumpkin seeds to that golden-brown zenith of nuttiness? Great! Now, let’s chat about squeezing out that liquid gold—otherwise known as pressing pumpkin seeds. This stage, my friends, is where the rubber meets the road, or should I say, where the seed meets the press!
Traditional vs. Modern Pressing Techniques
First things first, pressing ain’t what it used to be. Traditionally, people would use a manual press. It’s arduous, sure, but it gives you a workout—as if you’re churning butter back in the ol’ homestead days. Nowadays, we’ve got electric oil presses that do the heavy lifting for us. And let me tell you, they’re worth every penny if you’re serious about your seed oil game. Talk about a time-saver!
DIY Home Oil Press Options
Think you need fancy equipment? Think again! There’s a slew of DIY home oil press options out there. Some folks swear by the wine press method – yes, the one you’d typically use to stomp grapes into oblivion. Others might get crafty with a car jack—don’t knock it till you try it! The point is, there’s more than one way to press a pumpkin seed, and it doesn’t have to break the bank.
The Role of Heat in Oil Pressing
Now, let’s talk heat. It’s a bit of a Goldilocks situation: too much, and you’ll cook the subtle flavors right out; too little, and the oil won’t flow as freely. You want that “just right” temperature. Warm enough to coax the oil out, but not so hot that you compromise its integrity. It’s a delicate balance, but once you find it, you’ll feel like a wizard at the cauldron of deliciousness.
And after all that pressing, it’s crucial to remember that you’re not quite done yet. Oh no, there’s still the matter of filtering, which we’ll dive into next. Just imagine those tiny impurities waving goodbye as you filter them out, leaving you with the purest pumpkin seed oil this side of the Mississippi. But hey, let’s not get ahead of ourselves—we’ll cover all that jazz in the next section.
Filtering Your Liquid Gold
Alright, folks – you’ve pressed those toasty seeds and before you lies a vat of murky potential. You’re on the brink of pure pumpkin seed oil bliss, but first, we gotta get that potion lookin’ pristine. Filtering, my friends, is not just a step; it’s an art. So, slap on your apron, and let’s get that oil from cloudy to crystal-clear! 💧
Straining: The First Line of Defense
Imagine this: you’ve just pressed your roasted pumpkin seeds and you’re looking at your oil – it’s real, it’s here, but it’s got floaties. Yikes! Not to worry, just grab a strainer. Metal, cloth, or paper, anything goes as long as it keeps the solids out. Here’s a neat trick—line a fine mesh strainer with a cheesecloth and gently pour the oil through. Pro Tip: Don’t rush this part; we’re after purity, not a race.🏅
Sedimentation: Patience Pays Off
Now, let’s chat about sedimentation. Sounds fancy, right? But it’s pretty much like making a great cup of coffee…if your coffee was oil and you swapped coffee ground for seed bits. Just set your oil aside in a jar and let gravity do its thang. The heavy particles will sink to the bottom after a good night’s rest—a sight more satisfying than my dog catching her tail, let me tell you! 😄
Removing the Last Impurities
Lastly, after you’ve strained and let sedimentation work its wizardry, some fine, stubborn particles might still be floating around, thinking they own the place. Ain’t nobody got time for that. A second, finer filtration might be needed, and this can be done with a coffee filter or another round of cheesecloth. You’ll be left with oil that’s so pure, it could sing opera.🎶
Now, remember, once the filtering festivities are over, we’re not done yet. Oh no, we’re movin’ on up to the big leagues with Storing for Peak Freshness and Flavor. Don’t go thinking you can just bottle this liquid sunshine and shove it in the back of the pantry. No sir! Stay tuned to find out how to keep this golden treasure so fresh, it might just outlast your guilty pleasure Twinkie stash—but I wouldn’t bet on it! 😉
Storing for Peak Freshness and Flavor
So, you’ve gone all ‘mad scientist’ in your kitchen and now you’ve got a little pot of pumpkin seed oil so precious, you’re almost afraid to use it. Fear not, friends! I’m here to give you the lowdown on storage because, let’s face it, you want that liquid gold to taste like the first day of fall every single time you pop the cork.
Now, don’t go shoving that bottle in just any old cupboard. Nope, pumpkin seed oil is a bit of a diva, and it demands the star treatment.
Selecting the Right Vessels
- Dark Glass Bottles: You gotta keep that oil away from light like it’s a vampire hiding from daylight!
- Air-Tight Seals: Oxygen is your oil’s arch-nemesis—keep it out and maintain that nutty perfection.
Ideal Conditions for Longevity
- Cool: Think Batman’s cave cool – around 50-65°F (10-18°C) is prime time.
- Dark: Like a mystery novel, the less light, the better.
- Stable: Keep it steady. No wild temperature swings, please!
Now, here’s a little secret from my pantry to yours—if you’ve got a cellar (oh la la), that’s your oil’s new penthouse. No cellar? A kitchen cabinet away from the oven’s heat will do just fine.
The Shelf Life Sweet Spot
Wondering how long your masterpiece will last? Properly stored, your pumpkin seed oil can be your culinary sidekick for 6 to 9 months. But hey, who’s counting? You’ll use it WAY before then, ’cause it’s just too darn delicious.
And remember, if it starts smelling like Uncle Bob’s old gym socks or tastes like cardboard, it’s time to bid it adieu. Freshness is key for that sublime taste!
Alright, you’re all set with the storage smarts. Next up, we’re diving into the fun stuff: Culinary Inspirations. Ready to drizzle, dash, and dollop? Stay tuned!
Culinary Inspirations: Using Pumpkin Seed Oil
Alright folks, pop open those jars – it’s time to jazz up your meals with that luscious pumpkin seed oil you’ve lovingly pressed. You’ve got this gorgeous, nutty elixir staring at you from the kitchen counter, begging to be drizzled on, well, just about everything. Let me guide you through some culinary escapades where this liquid gold can really shine.
Drizzling Over Delights
First off, think salad dressings. Ya know, those leafy greens are just waiting for a splash of personality, and a simple dressing with your homemade pumpkin seed oil, a little cider vinegar, and a pinch of salt can send your taste buds to seventh heaven. But why stop there? Imagine a roasted butternut squash or sweet potato soup with a ribbon of oil adding a smooth, velvety finish.
Pumpkin Seed Oil as a Finisher
Oh, and here’s a secret – use it as a finisher for dishes! A drizzle atop your risotto or pasta can add a complex, subtle toasty note that’s simply divine. Picture this: a plate of mushroom risotto, that earthy aroma wafting up to greet you, and just before serving, a generous swirl of pumpkin seed oil gracing the top. Perfection!
Pairing with Other Ingredients
Now, when it comes to pairings, this oil plays nice with a variety of ingredients. It’s like the social butterfly of your pantry. It hobnobs well with cheeses, particularly goat cheese, elevating a simple cheese and cracker moment to an artisanal experience. And nuts? Throw some toasted walnuts or pecans into the mix – oh, the harmony!
Pro tip: don’t get all heavy-handed with heat here. Like a delicate flower, pumpkin seed oil wilts with too much heat, so it’s best used as a finishing touch to preserve its character and maximum nutrition. Remember, we’re going for finesse, not a fry-up.
Before we pivot to the next topic, have you ever thought about dessert? Because, yes, a drizzle of pumpkin seed oil on a scoop of vanilla ice cream is pure, unexpected joy. Stay tuned, because we’re diving into the intricacies of storing your new favorite kitchen staple to keep it at peak deliciousness.
FAQs on Homemade Pumpkin Seed Oil
Hey there, fellow kitchen adventurers! So, you’ve gone and pressed your very own pumpkin seed oil – that’s pretty rad! 🎃 But now you’re probably swamped with questions, right? Don’t you worry; I’ve been down this road before. Let’s hash out some of the most head-scratching queries together, shall we?
Can I Use Any Type of Pumpkin Seeds?
Oh, great question! You’re thinking like a true chef now. 🧑🍳 The short answer is yes, but — and it’s a big but — not all seeds are created equal, my friends. You’ll wanna snag the best, most plump seeds you can find; heirloom varieties often have more oomph in flavor. Otherwise, your oil might taste as dull as dishwater, and we can’t have that!
How Long Does Homemade Oil Last?
Alright, so you’ve bottled up your culinary masterpiece, and now you’re pondering its shelf life. In the cool, dark confines of your pantry, this oil could chill for a good 6 months. But remember – homemade goods don’t have those fancy preservatives, so keeping it in the fridge could stretch that timeline out a bit more. Just give it a sniff test before using; trust your nose, it knows!
Troubleshooting Common Oil Pressing Issues
- The No-Show Oil: You’ve pressed so hard you could’ve made diamonds, yet no oil is flowing? Patience, my friend. Pre-roasting could be your golden ticket to getting those juices flowing.
- Cloudy Conundrums: Is your oil murkier than a foggy morning in San Francisco? It might just need some time to settle. Sedimentation is your buddy here — let gravity do its thing.
- Flavor Fizzles: Ended up with an oil blander than vanilla ice cream? Sprinkle in a bit of seasoning while roasting those seeds. It’s all about layering flavors, like a tasty tiramisu of tastiness!
Got more questions burning a hole in your pocket? Just holler. I’m always around to spread the good oil gospel. In closing, happy pressing, and may your dishes be forever blessed with the nutty goodness of pumpkin seed oil!
Thanks for reading, folks. Keep on pressing and impressing! “Oil’s well that ends well!” 😉✌️