
Unveiling the Secret: Chip-Less Cookie Delights
So, you’re all set to whip up some chocolate chip cookies, and bam! You discover your stash of chips has pulled a Houdini. No worries, my friend. Who says we can’t improvise? Let’s dive into the crafty art of chip-less cookies that’ll make your taste buds do a happy dance. 🍪✨
Chocolate Bar Breakdown
First up, raid that chocolate bar you’ve got squirreled away for emergencies (don’t pretend you don’t have one). Give it a good ol’ chop-chop, and voila! You’ve got chunky morsels that’ll melt into pools of deliciousness. And hey, who’s to say what shape your chocolate should be in a cookie, right?
Resourcefulness with Cocoa Powder
Got cocoa powder gathering dust in the back of your cabinet? It’s time for its moment in the spotlight. Whip it into your batter for a rich, chocolatey flavor that’ll make you wonder why you ever bothered with chips in the first place. Just remember, when you’re playing with cocoa, a little goes a long way – unless you’re going for chocolate oblivion, then by all means, my friend, pour it on!
Nifty Nutty Add-ins
And here’s a nutty idea: throw in some nuts! Walnuts, pecans, or almonds can add that crunch and richness that’ll make you forget all about those absent chocolate chips. Toast ’em up a bit before you mix ’em in, and I’m tellin’ ya, it’s a game-changer. Your cookie, your rules. 🌰
Now, don’t get me wrong, chocolate chips are the bomb, but there’s something about scraping the pantry and getting all MacGyver with your ingredients that just feels right. Maybe it’s the thrill of the unknown or the sweet victory of a baking challenge conquered. Whatever it is, chip-less cookies are here to shake up your baking routine and prove that sometimes, the best treats come from thinking outside the chocolate box. Happy baking!
Prepping Your Kitchen Battlefield
Alright, folks, before we jump headfirst into the wild adventure that is baking the perfect chip-less cookie, let’s get our ducks in a row. I mean, you wouldn’t go into battle without checking your armor, right? So, let’s get that kitchen ready for action!
Gathering the Essentials
First things first, let’s talk ingredients. Where the heck did I put the baking soda last time? And seriously, can someone tell me why the flour always hides when you need it most? Make sure everything you need is on deck – I’m talkin’ sugar, butter, eggs, and hey, don’t forget the secret weapon: vanilla extract. That little bottle is like the Gandalf of flavor in the Lord of the Rings of your cookie dough.
Preheat Protocol
Now, onto the beast – the oven. Preheat that bad boy to the right temp and don’t you dare skip this step! A cold oven is like a sleepy dragon; it just won’t give your cookies the fire they deserve. While you’re at it, clear off that countertop. You’ll need space to unleash your cookie artistry, and let’s be honest, nobody’s got time to play Jenga with kitchen appliances when there’s baking to be done.
Baking Tools Line-up
And here’s the kicker – make sure your tools are all lined up and ready to roll. Get those cookie sheets out. No, not the ones from the last bake sale that look like they’ve seen better days. The good ones. Grease ’em or line ’em with parchment paper, your call. Then, grab your mixing bowls, whisk, and everything else you’ll need. Lay ’em out like you’re the commander of a delicious army.
So, in the midst of this great kitchen prep session, just remember: Have fun with it! Crank up the tunes, do a little dance, make a little love… to your cookies, that is. Because when your space is set, and your tools are at the ready, you’re on the fast track to cookie town, population: your taste buds. And remember, a well-prepped kitchen means less mess, more success, and a heck of a good time. Let’s bake magic happen!
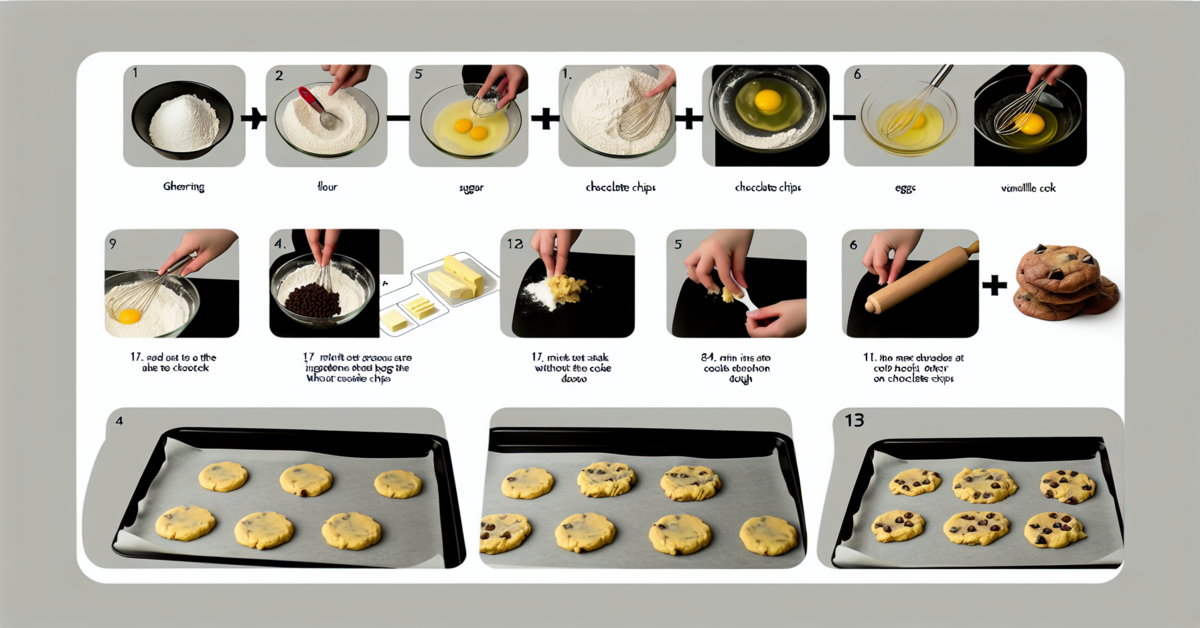
Whisking Up a Delectable Dough
Alright, cookie cadets, let’s get down to the nitty-gritty of dough-prep – the backbone of any self-respecting cookie, especially when you’re out of those chocolate chunks we all go cuckoo for. Now, you might be thinking, “Can you even call it a cookie without chocolate chips?” Stick with me, and we’ll whip up a batch that’ll make your tastebuds forget what they’re missing! 😜
The Creaming Method Mastery
First off, let’s tackle the creaming method. Sure, we could just throw our butter and sugar in a bowl and call it a day, but where’s the finesse in that? Nah, we’re going for gold here! You want your butter soft but not melted. Think ‘leave it out while you watch an episode of your favorite show’ soft. Then, beat it with the sugar until it’s fluffier than a poodle at a dog show. This is where the magic starts, folks; it’s what gives our cookies their rise and that oh-so-lovely texture.
Balancing Sugars for Optimized Sweetness
Onward to sugars! A mix of brown and white gives you that chewy-on-the-inside, crisp-on-the-outside nirvana. Brown sugar is basically white sugar that hit the jackpot with a bit of molasses. So, it’s not just about sweetness here; it’s about that deep, caramel-y flavor that’ll make you go “Mmm!” before you’ve even taken a bite.
Achieving the Perfect Dough Consistency
- Next up, consistency is key. You want your dough to be like that favorite pair of jeans: holding together just right but still soft enough to be comfy. If the dough’s too sticky, add a smidge of flour. Too dry? A dash of milk. It’s a balancing act, and you’re the ringmaster.
- Remember, overmixing is the enemy of good dough. Mix just until the ingredients are BFFs – thoroughly combined, but not planning a weekend getaway together.
So there you have it, dough devotees. With a little love and some elbow grease, you’re well on your way to cookie greatness, chips or no chips. Get that oven fired up and those sleeves rolled – it’s baking time!
Alternative Mix-Ins: The Heroes of Flavor
Alright, my fellow cookie enthusiasts, let’s huddle up! So you’ve found yourself chip-less, staring at that cookie dough and feeling a little blue? Chin up, buttercup, because we’re about to go on a culinary adventure that’ll make even the plainest of doughs feel like they’ve hit the flavor jackpot. 🍪
Dried Fruit Fiesta
First off, let’s talk dried fruit. Oh, I see you raising an eyebrow, but hear me out, okay? Chopped dates, anyone? These sweet gems will caramelize on the edges and turn your cookie into a chewy delight. And let’s not forget about raisins – they’re practically veterans in the cookie game, plus they keep things moist and chewy. But if you wanna get wild, throw in some dried cranberries or cherries for that tart kick. Now that’s what I call a party in a cookie!
Seed and Nut Alchemy
Moving on to our next magic trick: nuts and seeds. Swap those chips for chopped walnuts, slivered almonds, or even some sunflower seeds for a crunchy surprise. They add a nutty depth that’ll have folks begging for your secret. And let’s not disregard the power of pepitas – those little pumpkin seeds can add a unique flavor and a delightful crunch. Honestly, nuts and seeds are kind of the unsung heroes in the cookie world, so let’s give ’em a round of applause, shall we?
Sweet Swirls: Jam and Caramel Options
Last but not least, let’s get saucy with some sweet swirls. A dollop of jam or a drizzle of caramel can work wonders. Create little pockets of fruity or creamy goodness that’ll ooze out with every bite. Pro tip: swirl it in gently with a knife or a toothpick – it’s about creating art in your cookies, and who doesn’t love an edible masterpiece?
Remember, baking is about breaking rules and making something truly your own. So go on, get mixin’ and watch as these alternatives elevate your cookie game to the next level. And hey, who knows? You might even start a new cookie trend. Happy baking!
Shaping and Spacing Your Cookie Creations
Alright folks, it’s time to get our hands dough-y! Ever wonder why your cookies come out more like abstract art than the perfect circles you envied on Instagram? Well, guess what—it’s all in the shaping and spacing, and I’ve got some tricks up my sleeve that’ll turn your cookie game around faster than you can say, “Who stole the cookie from the cookie jar?” 😏🍪
Rolling the Ideal Balls
First things first, let’s roll with it, shall we? If you’re like my buddy Jim, who thinks “eyeballing” the dough size is a legit strategy – spoiler alert – it ain’t. Trust me, your cookies will be all over the place. Pro tip: use a cookie scoop for uniformly triumphant treats, ensuring each one gets their fair share of the spotlight (and oven space!).
The Spacing Saga
Now, let’s talk real estate—oven edition. Like any good block party, you gotta give those cookies room to mingle (but not too much!). Place em’ about 2 inches apart on the baking sheet. Remember, they’ll spread out like folks loungin’ in the park on a sunny day. By spacing ’em out, we avoid those cookie merge mishaps that result in one giant cookie blob—not that there’s anything strictly wrong with that, I suppose.
To Flatten or Not to Flatten
Ah, the Shakespearean cookie question of our times: to flatten or not to flatten? Well, it depends on how you like your cookies – like my friend Paula, who swears by thick and chunky (mind outta the gutter, please), while her husband is team thin and crispy. If you’re with Paula, leave those dough balls as they are. Team Crispy? Give ’em a wee nudge with a glass bottom before sending them into the oven’s warm embrace.
| Texture Preference | Technique |
|---|---|
| Thick & Soft | Ball ’em up! |
| Thin & Crispy | Gently flatten |
“The secret of success in life is to eat what you like and let the food fight it out inside.” – Mark Twain
Remember: Whether you’re a rebel without a cause, a detail-oriented planner, or somewhere smack-dab in the middle, the cookie shaping and spacing ritual is your passport to that sweet ‘n’ satisfying batch of homemade goodness. Experiment with these tips and who knows? You might just find your signature cookie style that’s all the rave at your next shindig!
Timing and Temperature: The Baking Equation
Alright, cookie cadets, it’s time to talk about the make-or-break moment in our chip-less cookie adventure – the baking equation. You know, that delicate dance of timing and temperature that can catapult your sweet treats from just ‘meh’ to ‘dayum, who made these?!’
Oven Hotspots and How to Outsmart Them
First things first, let’s tackle the beast that is your oven. Every oven’s got its quirks, kinda like that one uncle with his off-the-wall conspiracy theories. You gotta get to know these quirks to avoid a cookie catastrophe. Maybe the back-left corner is the Bermuda Triangle of your baking space – cookies enter, but they don’t come out – well, not in one piece anyway. Here’s the pro move: rotate your baking sheet halfway through the baking time. It’s like giving all those doughy dudes fair time in the sun.
Setting the Timer: Patience Pays Off
Now, let’s gab about that ticking tyrant: the timer. Patience is a virtue, especially in the baking game. Underbake, and you’ve got doughy disks. Overbake, and well, let’s just say they’ll be great for propping open your door. You’re aiming for that golden sweet spot – literally. Set your timer a couple of minutes less than the recipe calls for and that’s when you start your cookie vigil. Oven light on, eyes sharp, you’re on watch duty.
What to Expect When They’re Expecting (to Be Baked)
Last up, the anticipation! Freshly baked cookies can send heavenly aromas wafting through your kitchen, quickening the pulse and making stomachs growl. The edges should be tan like they’ve just returned from a sunny vacation, and the centers should still look a tad underdone when you pull them out. Why? They’ll keep cooking a bit ’cause of the residual heat – it’s like the after-party for cookies.
So there you have it folks, the lowdown on perfecting those chip-less wonders. Remember, each oven’s as unique as a snowflake in a Texas summer, so get to know yours and treat it right. They say baking is a science, but don’t forget, there’s a dash of magic in there too.
Judging Doneness and Cooling Protocol
So, you’ve followed your cookie recipe to a tee, your kitchen smells like a slice of heaven, and now the moment of truth is upon us: Are they done yet? Friends, the struggle is real! Here’s the lowdown on getting that timing just right.
Cookie Color Cues
First up, let’s talk color. Golden-brown edges? Check. But hold on there, partner—don’t you dare forget about the bottom! Lift one gently with a spatula; if it’s resembling a sun-kissed beach, you’re golden (pun intended 😉). But if it’s looking like a bad spray tan, whoa Nelly—pull ’em out pronto!
The Cooling Dilemma: Wire Rack or Countertop?
Now, here’s a hot topic: to cool on a wire rack or make do on the countertop? Look, if you’re aiming for that A-list crunch, give ’em air! A wire rack is your ticket to stardom – it stops the bottoms from steamin’ and gettin’ soggy. No wire rack? No sweat! Just slide that parchment paper right off the baking sheet onto the counter. Ta-da!
Pro Tip: C’mon, don’t be a busybody! Moving cookies too soon is a recipe for a crumbled disaster. Let ’em chill for a solid few minutes on the baking sheet first.
Storage Tips for Prolonged Freshness
Last, and certainly not least: cookie storage. So you resisted inhaling the whole batch on day one, huh? Kudos! Now, when those bad boys are cool as cucumbers, usher ’em into an air-tight container. Remember, friends, cookies are like secrets; they must be well-kept. Slip in a slice of bread – yeah, you heard right – it helps keep things moist.
Here’s the table you never knew you needed:
| Sign of Doneness | What to Do |
|---|---|
| Golden-brown edges | Check the bottom, then take out to cool. |
| Pale middles | Give ’em a minute, but don’t overbake! |
| Overly browned | Remove immediately; note to lower oven temp next time. |
In conclusion, judging doneness is an art and cookies are the canvas. Keep your peepers peeled for the tell-tale signs of perfection, and let them cool with care. With this sage advice, you’ll be the cookie whisperer of the block — just don’t forget to save a few for yourself! 😉
FAQs: Ingenious Solutions to Cookie Queries
Alright, cookie comrades, let’s tackle some of those head-scratchers you’ve sent my way. Got questions? I’ve got your back—along with a sprinkle of sass and wisdom. 😜
Can I Use Chocolate Syrup Instead?
So you’re desperate for a chocolatey kick but the chip cupboard is bare? I feel ya. Yes, you can dribble in some chocolate syrup, but don’t go overboard—you’re making cookies, not soup! Swap out a smidge of liquid from the recipe with the syrup to avoid cookie dough swimming pools. A little goo goes a long way!
Storing Cookie Dough for Later: The Ultimate Cookie Cliffhanger
Got dough dreams bigger than your belly? Here’s a pro tip: roll that extra dough into a cookie log, wrap it in your fanciest cling-film (we’re not animals), and chuck it in the freezer. When the cookie monster roars, just slice and bake. Et voilà, instant gratification!
Achieving the Great Crunchy vs. Chewy Debate
This is the stuff of legend, folks. For crunchy aficionados, bake those babies a minute or two longer—just don’t char ’em unless you like that smoky flavor (no judgment). On the flip side, chewy team members need to pull ’em out a tad earlier. Don’t let ’em cool too much on the baking sheet or they’ll keep cooking, and before you know it, you’ve got a brittle situation on your hands.
There you have it—a triple scoop of tips to keep your cookie game strong. Remember, when life gives you a chocolate chip shortage, make… chocolate chip-less cookies! And if you’ve still got questions, just holler. I’ve got more answers than a trivia night at the local pub.
Overall, experimenting is the name of the game—and you just might end up inventing the next big hit in the cookie world! Keep on bakin’, and don’t forget, a day without laughter is a day without cookies. 😉
Thanks for sticking around, cookie connoisseurs! Keep those ovens hot and those taste buds ready for adventure. ‘Til next time, bake it till you make it! 🍪