
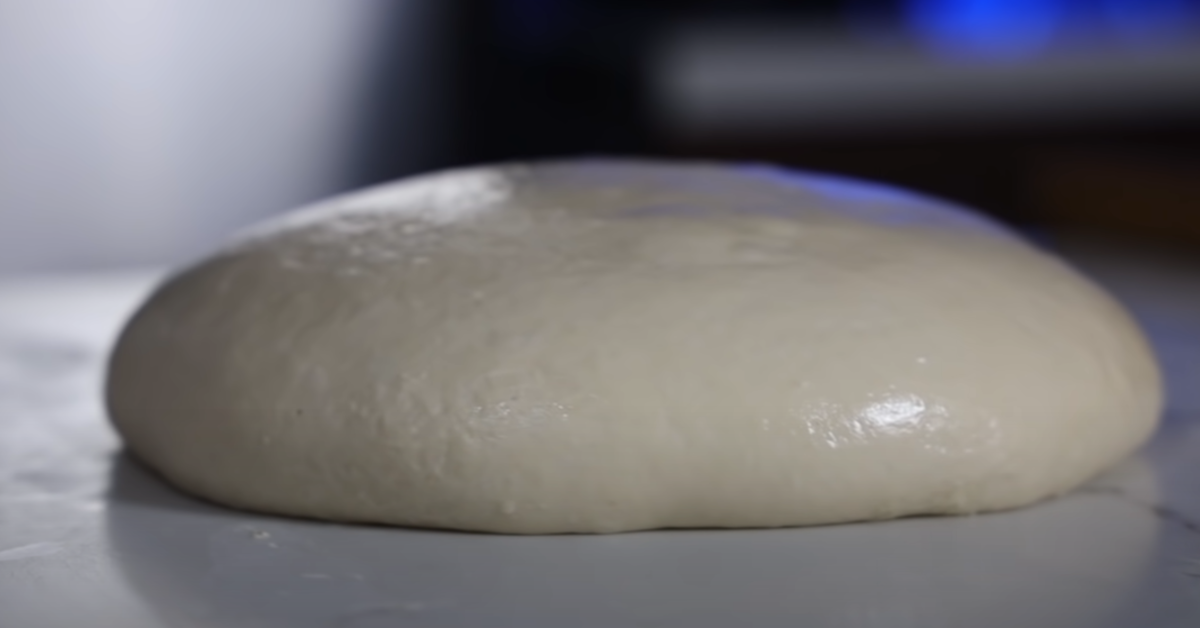
The Key to Non-Stick Dough Preparation
Ever had that sticky situation where your dough just won’t let go of your hands or the countertop? Well, let’s knead our way outta that mess! First things first, let’s talk about that magic move – the perfect flour dusting technique. It’s like fairy dust for bakers; a little sprinkle and bam, your dough practically rolls itself out. 🧚♂️
The Perfect Flour Dusting Technique
Look, we’re not making snow angels here, so don’t go overboard. You want just enough flour to create a thin barrier between the dough and the surface. I’m talkin’ a light, even spread folks – think of it as giving your countertop a quick tan. Remember, too much flour and you’ll end up with a drier dough and who wants that? Not me! 🍕
Choosing the Right Surface
Now, where you roll that dough matters more than you might think. Wood, marble, stainless steel – they’re like the Avengers of surfaces, each with their own superpowers. Wood’s got that natural non-stick vibe, marble stays cool under pressure, and stainless steel? Well, it’s just plain easy to clean. Pick your hero wisely!
And talk about a pro tip: if you’re in a pinch, even a big ol’ cutting board can be your dough-rolling haven. Just make sure it’s anchored down, because nobody wants a dough-rolling rodeo in their kitchen, am I right?
Stick with me, and we’ll get that dough smoother than a jazz tune on a Saturday night. Up next, we’ll dive into the correct hydration ratio for your dough. Because let’s face it, nobody likes a crumbly crust. It’s all about that tender chew, my friends – and I’m here to show you just how to get it. Can I get a “heck yeah” for hydration? 🙌
Correct Hydration Ratio for Your Dough
Ever found yourself in a sticky situation with your pizza dough? Fear not, my fellow dough aficionados! The secret to perfectly pliable dough lies in mastering the hydration ratio. And no, I’m not talking about guzzling eight glasses of H2O a day – though that’s good for your health! We’re diving into the delicate balance of water and flour that’ll make your dough just right.
The Balance of Wet and Dry Ingredients
You see, folks, it’s not just about tossing together some flour and water and hoping for the best. That’s like trying to make a soufflé with a flamethrower – possible but not recommended. The key is to start with a precise measurement; typically, a flour-to-water ratio of 5:3 is your golden ticket. But, the plot thickens! Depending on the flour type and the humidity in your kitchen, you might need to tweak those numbers.
How Different Flours Affect Hydration
Speaking of flour power, not all flours are created equal. Each type of flour – from all-purpose to bread flour – has its own absorption rate. Whole wheat? It’s like the sponge of the flour world, soaking up more water than your average white flour. So if you’re swapping flours, remember to adjust your water levels accordingly. Otherwise, you’ll end up with dough that’s drier than a humorless stand-up act.
Once you’ve nailed the hydration ratio, you’re well on your way to pizza perfection. But hold your horses! You can’t rest on your laurels just yet. Proper kneading and the magic of proofing are up next. So, roll up your sleeves, because we’re about to get down and doughy with Meticulous Kneading: The Foundation.
Meticulous Kneading: The Foundation
Ever tried to knead dough and ended up with a sticky mess more suited for a modern art exhibit than a pizza? Well, my friend, you’re not alone. But fear not—I’m here to guide you through the zen of kneading. It’s the cornerstone of a pizza that’ll make your taste buds do the tango.
Kneading Duration for Elastic Dough
So, you wanna know the secret to an elastic dough that doesn’t stick to your hands like a needy sea anemone? It’s all in the timing, baby! Most doughs need a good 8 to 10 minutes of kneading love. But hey, don’t just watch the clock; let the dough’s texture talk to you. When it’s smooth as your uncle’s bald head and springs back faster than your last yo-yo comeback, you’re on point.
The Telltale Signs of Well-Kneaded Dough
Speaking of texture, let’s not forget the signs of a perfectly kneaded dough. It’s like that moment when everything in a symphony comes together—a harmonious blend of gluten bonds and elasticity. If it’s still looking a bit ragged, like my first attempt at a quarantine haircut, keep going. And when you’re done, that ball of dough should be as smooth and supple as a baby’s behind, no stickiness in sight!
- Consistency: Aim for a consistency that’s neither too firm nor too soft. It should be just like your favorite pillow, offering a little resistance but still pliable.
- Surface: The surface should be as smooth as a jazz saxophone solo. Rough spots? Keep kneading, you’re not there yet!
- Temperature: Your dough should be slightly warm from all the action, not hot and bothered or cold and indifferent.
But hang on, what comes after you’ve kneaded your heart out? Well, stick around as I take you to the next level: The Art of Proofing Pizza Dough. Stay tuned for more tips on how to let your dough rise to the occasion without turning into a sticky disaster!
The Art of Proofing Pizza Dough
Ever been in that sticky sitch where your pizza dough clings to everything but your pizza stone? Fret not, fellow dough wranglers, ’cause I’m about to let you in on the secret life of yeasty beasties and how proofing can save you from a dough disaster!
Ideal Proofing Conditions
First things first: yeast is a fickle little fungus and craves the perfect chill-out spot. Too cold, and it’ll nap on you; too warm, and it’ll throw a wild party. So, what’s the magic number, you ask? Well, aim for a cozy 70-75°F (21-24°C). This sweet spot will get those yeast cells puffin’ up your dough just right. And hey, if you’re looking for the perfect pairing with your pizza, why not check out my flavor-packed suggestions?
Covering Techniques to Retain Moisture
Now, onto the sauna for your dough – and no, I’m not suggesting a spa day. Covering your dough is like tucking in a baby; it keeps the moisture locked in and the dry, crusty nightmares at bay. You’ve got options here: a clean kitchen towel does the trick, or plastic wrap if you want to go the clingy route. Spritz a little mist of water on top before covering to give it that extra hydration hug.
All these steps are crucial, but remember, we’re not quite done yet. This process can be as satisfying as sliding a pizza off the peel and into the oven without any stickage. So, keep your rolling pins at the ready, and let’s prepare to roll out some seriously smooth dough in the next chapter of our pizza odyssey.
Rolling Tactics to Ward Off Stickiness
Let’s talk about rolling out your dough, because let’s be honest, nobody wants to end up in a sticky situation, am I right? Now, you’ve done all the hard work kneading that dough to perfection and let it rest like a sleeping baby – but this infant’s not gonna put up a fuss if you skip the lullabies. It’s showtime!
The Roll-and-Turn Method
First things first, you gotta master the roll-and-turn method. Here’s the deal: give that dough a good ol’ roll, and then, just like you’re turning the dial on a safe cracking your Great Aunt Marge’s cookie recipe, turn it a smidge. It’s not rocket science, just a quarter turn will do the trick. Keep rolling and turning, almost like you’re painting a masterpiece with a rolling pin. Oh, you think that’s just a bunch of hoopla? Ha! Try it. Your dough will come out rounder than a beach ball and smoother than a jazz tune.
- Pro Tip: Use a silicone mat as your canvas to keep things neat – like a pro!
“A little bit of dance, a lot more dough” – that’s what I say. I mean, you don’t see a pizza chef skipping this part, right? It’s the twist they didn’t know they needed at that dough disco.🕺🍕
Maintaining Uniform Thickness
And hey, don’t go pressing down on that dough like you’ve got a grudge against it. Our goal isn’t flat as a pancake; we’re making pizza crust here, folks. Apply gentle, even pressure and aim for that sweet spot in thickness. I’m talking the Goldilocks zone – not too thin, not too thick. Just right. What’s that magic number? Aim for about 1/3 inch; that way, you get a nice rise without creating a chewy tire. Complex carbs shouldn’t give you a workout, right?
| Thickness | Outcome |
|---|---|
| Too Thin | Breaks faster than a Hollywood marriage. |
| Just Right | As perfect as your grandma’s hugs. |
| Too Thick | Could double as a yoga mat. |
So, remember folks, roll, turn, and adjust with a gentle touch. Your dough’s not going on a second date if you mess up the first impression. Alright, now that we’ve got our dough looking runway-ready, let’s chat about the trusty tools for tactile dough handling. You’re gonna need the right gear for that, but more on that in the next slice of advice.
Trusty Tools for Tactile Dough Handling
Ever found yourself battling with a pizza dough that’s clinging to everything but your charm? Well, let me tell you, the right tools aren’t just for the pros—they’re for smart home chefs like us too. So let’s gear up on some dough-manipulating gadgetry!
Benefits of a Dough Scraper
First off, the dough scraper—your new best friend in the kitchen. It’s not just a scraper; it’s a lifeguard for your dough. Kneading without one is like going into a food fight unarmed! A dough scraper cuts through dough with ease, helping you portion and lift it without causing a sticky scene. But wait—there’s more! This little beauty also helps scrape residual dough bits off your counter. Clean up just went from “ugh” to “ahh.”
- Efficiently cuts and divides dough
- Simplifies transfer from surface to bowl
- Keeps work surfaces clean
When to Use a Rolling Pin
Ah, the rolling pin. If you thought these were just for flattening dough, think again. A good rolling pin could be the difference between a workout and a masterclass in effortless rolling. The key is a light touch and confident action. And the secret? A dusting of flour on the pin for that non-stick roll-out. Fancy a tip? When you’re aiming for that perfect circular base, start from the center and work your way outwards in gentle, even rolls. Check out how we use rolling pins for more than just pizza in this sumptuous pancake recipe.
Remember, the right tool not only makes your job easier but also brings joy to the process! And now that you’ve got your tools sorted, you can focus on perfecting that toss (or maybe just a gentle lift and place).
Next up, don’t go anywhere because we’re about to dive into the strategic world of Tips for Transferring Your Pizza Base. We’ll cover everything from the cornmeal shuffle to the parchment paper slide. Get ready to transport that base like a pro!
Tips for Transferring Your Pizza Base
Alright, fellow pizza aficionados, let’s talk shop about the nail-biting moment of truth: transferring your pizza base to the oven.Now, don’t get your dough in a twist; this doesn’t have to be the part where your culinary masterpiece meets its sticky demise. With a little know-how and some savvy tips, you’ll be sliding that base into the oven smoother than a greased-up slip ‘n slide.
Crafting Cornmeal Carpets for Your Crust
First off, let’s put on our interior designer hats and discuss flooring – for your pizza, that is. Cornmeal, folks, that golden, gritty sprinkle, is like the Moroccan rug of the pizza world. Just a light dusting on your peel (or whatever you’re using to shimmy that pizza into the oven) can make a huge difference. The granules act like tiny ball bearings, giving your dough a free pass straight to the oven without any clingy goodbyes. Talk about a smooth operator!
- Pro Tip: Don’t go overboard with the cornmeal, or you’ll have a crunchy situation on your hands – and under your teeth.
The Parchment Paper Hack
Now, what if you’re out of cornmeal, or just allergic to mess? Well, parchment paper is your knight in shiny armor. It’s like that friend who’s always got your back, especially when you’re nervously sliding your pizza baby off the counter. Simply place your dough on a piece of parchment paper and then, when the time comes, carry the whole shebang to the oven. The best part? No sticky business – it peels off like a dream once your crust is crisped to perfection.
“Parchment paper is not just for cookies, folks. It’s a pizza’s best pal in pinch.” – The Internet
And remember, you’re not done yet! We’ve still got more dough-savvy tricks up our sleeves. Keep on reading, and we’ll keep on rolling through this dough-licious journey together. Next up, we’ll be diving into those sticky situations that can turn pizza night into a sticky-fingered fiasco…
FAQs: Eliminating Pizza Dough Adhesion
Ah, pizza dough – you stretchy, delectable platform of joy, you! But let’s be real, sometimes you’re as clingy as my Aunt Martha at a family reunion. So, let’s dive into the nitty-gritty – or should I say, the floury-floury – of keeping you from sticking around when we’d rather have you slide into the oven with grace. 😉
How Long Should Dough Rest Before Rolling?
You ever get out of bed feeling like a million bucks, or let’s say, a lumpy mattress? Well, your dough feels the same way! It needs its beauty rest, folks. Let dough hang loose for at least 30 minutes before you give it the roll-out red carpet treatment. This rest period lets the glutens relax, which in turn makes the dough less elastic and way more workable. Geez, even dough needs a break!
Can Overproofing Cause Stickiness?
Overproofing your dough is like giving it the green light to throw a stickiness fiesta – and you’re not invited! When overproofed, the dough becomes more of a sticky situation. That’s because the yeast goes to town, produces extra gases, and turns your pretty pizza base into a hot sticky mess. Keep your eye on the proofing time, capiche?
Best Oils to Prevent Dough from Sticking
Let’s “oil” up for the big finale! A drizzle of oil on your dough can keep it slicker than a salesman at a used car lot. But which oil to use? Olive oil is the Godfather of pizza dough lubes – it’s classic, flavorful, and keeps things sliding smoother than a trombone solo. Just a thin layer on your dough ball before rolling, and voilà! No more stickiness drama.
Alright, doughboys and doughgirls – remember, preventing that pesky dough from sticking is all about taking the steps to treat it like the delicate, diva of deliciousness it is. Now, go – you’ve got pizza to perfect! 👋 And hey, thanks for sticking around (but not your dough!). Keep on rollin’, my flour-dusted friends!