
Before we dive into the brass tacks of grilling brats on a Blackstone
Hey there, grill enthusiasts! Ever wonder what’s the perfect temp to turn those brats on your Blackstone into the talk of the town? It’s like finding the sweet spot in your favorite recliner – crucial for the ultimate comfort! Get ready to preheat your griddle to that ideal warmth where brats sizzle to their mouthwatering best.
Preheating: A Crucial Step
First things first, let’s talk bout cranking up the heat. You wouldn’t skip the warm-up before a workout, right? So don’t skip preheating your Blackstone. Give it a solid 10-15 minutes to reach that even, medium-high heat, around 350°F to 400°F – that’s the Goldilocks zone we’re aiming for.
Tracking Temperature: Tools of the Trade
Now, unless you’ve got fingertips that can gauge temperature (and if you do, I’m mighty impressed), you’ll need a trusty infrared thermometer. That little gizmo is your secret weapon to grilling greatness. Just point, shoot, and get the deets without breaking a sweat.
Managing Hot Zones on Your Blackstone
Let’s face it, not all griddle spots are created equal. You’ll have hotter spots than a trending Twitter hashtag. Here’s a nifty trick – after preheating, sprinkle a bit o’ water across the surface. Those droplets will dance around like they’ve got ants in their pants, showing you where the hot zones are. You want to cook your brats in these spots for that crispy, golden-brown goodness.
So there we have it, folks! Armed with these sizzling secrets, you’re now ready to grill brats like a pro. Remember, keep an eye on that thermometer, and don’t be shy to shuffle those sausages around to find their happy place on the griddle. Happy grilling! 🌭
Prepping Your Brats: Secrets to Juicy Perfection
Ever wonder why your neighbor’s brats taste like they’ve been blessed by the sausage fairy? Well, buckle up, buttercup, ’cause I’m about to spill the beans on how to make your brats the envy of the block party.
To Poke or Not to Poke: Piercing Brats Before Grilling
First up, let’s talk about poking. It’s a hot debate – to pierce or not to pierce? Here’s the skinny: poking holes in your brats before they hit the grill can help them cook more evenly. But don’t go all psycho with the fork; a few well-placed pricks will do the trick.
The Marination Equation
Now, onto marination. It’s like a spa day for your brats – it tenderizes them and gives ’em a flavor kick. Whether you’re a beer-soak believer or an advocate for spiced-up solutions, let those babies marinate for at least an hour, and you’ll notice the difference.
Room Temperature Rest: A Necessary Ritual
Lastly, don’t toss cold brats on a hot grill. That’s just cruel. Show them some love by letting them rest at room temperature for about 20 minutes. This step is crucial for a juicy payoff, trust me.
So there you have it, folks – the holy trinity of brat prep. Poke ’em, marinate ’em, and let ’em rest. Do these right, and you’ll have juicy, flavorful brats that’ll make your taste buds do the hokey-pokey. Now, grab your tongs and let’s get grilling!
Grilling Time: Decoding the Duration for Divine Brats
Let’s talk turkey, or should I say bratwurst? We’re not just tossing these bad boys on the grill and crossing our fingers; we’re aiming for that je ne sais quoi of char and juiciness. So, how long do brats need to get cozy with your Blackstone? Well, it’s a bit like a dance, and I’m here to teach you the steps.
A Timing Guide for Bratwurst Bliss
First things first, the clock’s ticking from the moment those brats hit the griddle. You’ll want to give them a solid 15-20 minutes of heat-love, turning them every four minutes or so. That’s how you get the golden brown crust with a tender, juicy inside. Perfection? I’d say so.
Turning Tactics: When to Rotate Your Brats
Add a twist to your wrist and get ready to turn. Keep a keen eye on the brats – as soon as they start to sing (you know, that sizzle-sound that screams deliciousness), it’s time to give them a quarter rotation. This way, by the end, they’ve had an even suntan on all sides. Bye-bye uneven cooking!
Signs of Perfectly Grilled Brats
- Their skin should be a rich, golden brown, not unlike a toasted marshmallow at a campfire.
- They’ll feel firm to the touch, but still have a bit of a give – like a good handshake.
- And the aroma? Oh, it’ll be enough to make your neighbors wanna hop the fence for a bite.
Remember, folks, it’s not about the race; it’s about the journey – especially when that journey ends with a mouthwatering brat straight off the Blackstone. Happy grilling!
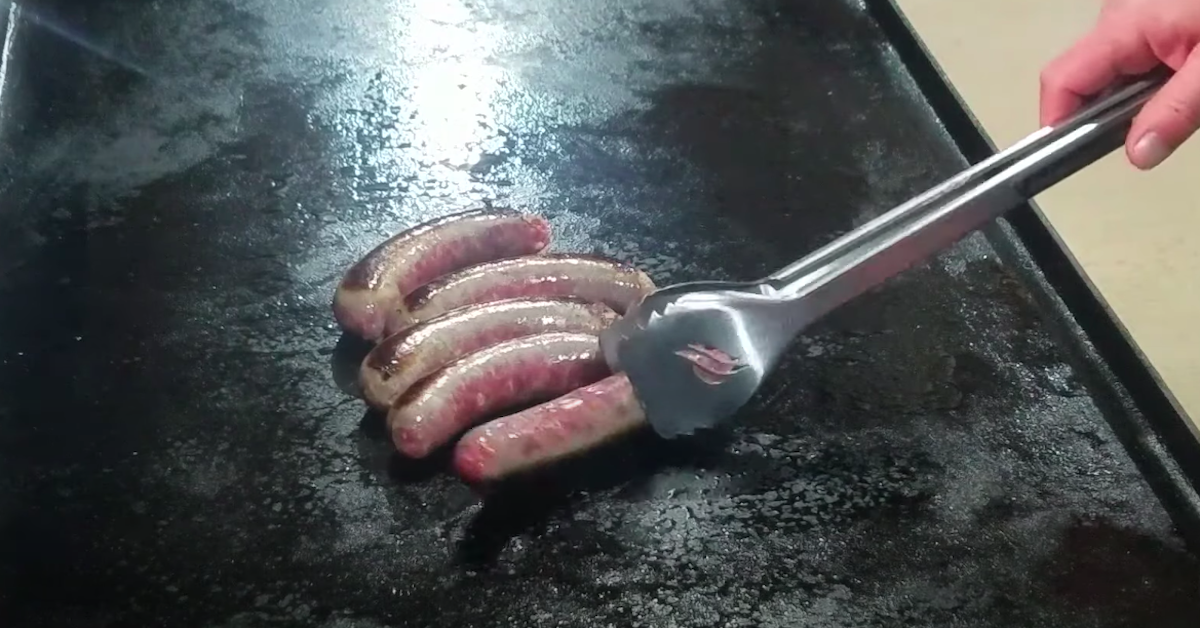
The Art of Flipping: When to Turn Your Brats
Okay, so you’ve got those brats sizzling on the Blackstone, and lemme tell ya, it’s kinda like watching paint dry, but way more delicious. Now, don’t get all antsy in your pantsy – knowing when to flip those bad boys is more art than science, so let’s dive in, shall we?
The Flipping Frequency
First things first, don’t be a helicopter grill parent. Your brats need a bit of space to get that gourmet golden brown. So, how often should you be flipping? Well, it’s not like flipping channels on the TV – we’re aiming for maybe 3-4 times during the cook. Not too much, not too little. It’s all about that balance 👌.
Identifying the Right Moment to Flip
Now, when to flip? Look for the clues, my friend. You’re waiting for that perfect sear. When the underside’s got a nice caramelized look, it’s time to give ’em a gentle turn. And hey, if you’re feeling whimsical, why not hum a tune while you wait? 🎵 Flip to the rhythm!
Common Flip Missteps and How to Avoid Them
It’s easy to flip out and make a mistake, so here’s the skinny:
- Flip Flop: Turning ’em too often? You’ll mess up the sear. Patience is a virtue, and in this case, it leads to perfection.
- The Press: Never ever press down on those brats. You might think you’re helping, but all you’re doing is squeezing out the juicy goodness. And we can’t have that!
- Stickler Situation: Ensure your griddle’s well-oiled to prevent the dreaded stick. A stuck brat is a sad brat.
In the end, just remember, great grilling comes down to feel and experience. So, don’t sweat it if the first few times are a bit rough around the edges. You’ll be flipping brats like a pro with a little practice. And always keep in mind, we’re shooting for tasty, not a perfect backflip – this ain’t the Olympics!
Additional Flavors: Infusing Your Brats with Pizzazz
Let’s face it, who doesn’t want to jazz up their brats every now and then? Sure, your classic wurst is pretty darn tasty on its own—but trust me, there’s a whole other level of wow-factor you can reach with a few snazzy tricks. Beer baths, herbs, and sauces? Oh my, yes please!
Beer Baths: A Match Made in Grilling Heaven
Ever thought about giving your brats a little boozy hot tub time before they hit the heat? Well, you should. Here’s the scoop: a nice lager not only tenderizes your brats but adds a depth of flavor that’ll make your taste buds dance the polka.
“Beer and brats: the Romeo and Juliet of the grilling world, minus the tragic ending.”
- Pro tip: Go for a beer with character, but nothing too overpowering—you don’t want to drown out the brat’s own flavors.
Herby Halos: Garnish Ideas for Gourmet Brats
We’re all about the greenery—no, not that kind, I’m talkin’ herbs, my friend! A sprinkle of rosemary or thyme right when your brats come off the grill can transport ’em from mere meat to culinary masterpiece.
- Top trick: Fresh herbs make all the difference. Dried ones are okay in a pinch, but c’mon, we’re going for gold here!
Saucy Additions: Maximizing Moisture and Taste
What’s a brat without a little sauce swagger? Whether it’s a classic mustard, a smoky BBQ, or even some secret family concoction—sauces can seriously elevate your grilling game.
| Condiment | Flavor Profile |
|---|---|
| Dijon Mustard | Tangy with a bite |
| BBQ Sauce | Sweet and smoky |
| Secret Sauce | Hey, I can’t spill *all* the beans! |
Remember, slapping on sauce too early can cause some unwanted stickage, but adding it towards the end? Chef’s kiss.
- Remember: Balance is key; don’t let your saucy zeal overpower the brat itself!
So, there you have it! A flavorful symphony ready to make your next cookout the talk of the block. Let’s grill, thrill, and get our gourmet on! 🌭🎉
Companion Fares: Pairing Sides with Grilled Brats
So, you’ve masterfully grilled a batch of brats that are sizzling, juicy and oh-so-inviting – what’s next? A bang-up brat’s only as good as its posse, and I’m not just blowing smoke here! Let’s dive into the symphony of sides that’ll transform your brat feast into legend… or at least the talk of your backyard bonanza.
Starchy Sides: A Delve into the Best Companions
Picture this: a golden-brown brat nestled next to a mound of buttery mashed potatoes. Now, that’s what I call a dynamic duo! And heck, why not throw in some crispy sweet potato fries into the mix? It’s the kind of comfort food that’ll have your guests loosening their belts and asking for seconds. And speaking of seconds, let’s not forget about the classic soft pretzel – a twist of heaven that’s a surefire crowd-pleaser.
Veggies on the Side: Grilled Goodness
- Grilled Corn on the Cob – It’s got that smoky char and a sweetness that plays off the savory brats like a culinary concerto.
- Zucchini and Bell Pepper Medley – Toss ’em on the grill, give ’em a sprinkle of herbs, and voilà! You’ve got yourself a color fest that’s not only easy on the eyes but also on the taste buds.
Condiment Couplings: Must-Have Sauces
Last but not least, let’s get saucy. We all know brats love to take a dip, so why not give ’em what they want? A dollop of spicy mustard or a slathering of homemade beer cheese sauce? You’ll watch those brats shine brighter than a diamond in a goats’ behind. And remember, it’s not about drowning the flavors—it’s about complementing them, so let’s keep it classy!
In closing, whether you’re a side dish savant or a condiment king, remember: a great bratwurst is only as memorable as the company it keeps. Now let’s eat!
Troubleshooting Common Blackstone Brat Blunders
Let’s face it, folks – grilling brats should be about as complicated as fishing in a barrel, right? But sometimes, things go haywire faster than Uncle Joe at a discount buffet. So let’s chat about dodging those grill gaffes and turning you into a Blackstone brat hero!
Sidestepping Burnt Sausages
No one wants a charred sausage – it’s not a campfire marshmallow, after all. Keep a sharp eye on the heat – those babies should be grilling, not auditioning for a firefighter’s training video. And remember, just like in baseball, it’s all about that pitch, or in our case, the angle. Tilt your brats frequently to avoid that dreaded burn!
Pro Tip: Invest in a good pair of tongs. They’re worth their weight in gold when you’re aiming for that perfect sear.
Ensuring Even Cooking Throughout
Folks, you want your brats cooked through and through – like a good story, there should be substance from start to finish. So keep those sausages moving on the dance floor – I mean, grill – to ensure they’re getting an even tan, much like sunbathing but tastier.
Pro Tip: Give your brats a little press with your spatula. If they feel like they’ve got the right bounce, you’re in the money!
The Great Clean-up: Post-Grilling Care
Okay, the party’s over and it’s time to turn off the lights – I’m talking about cleaning, folks. Getting down and dirty with your grill after the brats are done ensures your next cooking adventure won’t start with a horror scene of encrusted remnants.
- Don’t be shy with that scraper – get all the sticky bits off.
- Oil it lightly afterwards; think of it as moisturizer for your grill’s gorgeous skin.
Pro Tip: A touch of cooking oil on a hot grill after cleaning will season it like a well-loved cast-iron skillet.
And there you have it – you’re now armed to tackle any bratwurst blunder that could come your way. Follow these pointers, and you’ll be the reigning royalty of the Blackstone grill. Remember, practice makes perfect, so don’t be afraid to fire up that grill and try again.
FAQs about Cooking Brats on Blackstone
Alright, folks – gather ’round the grill coz it’s time to talk turkey. Or, more specifically, brats. You’ve thrown enough barbecues to know that the secret to grilling on a Blackstone isn’t just about firing up the flat top; it’s also about navigating through the smoke and mirrors of common questions. Let’s bust some myths and drop some knowledge bombs, shall we?
How Do I Prevent Brats from Sticking to the Grill?
First up, stickiness. Nobody wants their brats clinging onto the Blackstone like they’re on a roller coaster ride. The trick here? A high-quality oil with a high smoke point – think canola or vegetable. Give that Blackstone a little spa treatment with a thin oil layer before your brats hit the stage. Oh, and keep those temps moderate to avoid the dreaded burn.
Is There a Need to Rest Brats Post-Grilling?
You betcha! Letting those brats chill out for a few minutes after their grilling sprint lets the juices redistribute. Imagine them like marathon runners catching their breath – it’s essential for the taste marathon. Give ’em about five minutes. Trust me; it’s the difference between “meh” and “more, please!”
Can I Cook Frozen Brats on a Blackstone?
Last, but certainly not least: the frozen debate. Can you go from freezer to grill without a thaw? Sure, in a pinch, but expect a longer cook time and a vigilant eye to avoid an icy center with a charred shell. Ideally, thaw those babies in the fridge overnight for even cooking and optimum taste.
There you have it, grill enthusiasts. Tackle these FAQs, and you’re on your way to bratwurst brilliance. Happy grilling! 🌭😄