
Unveiling the Mystery of Curds and Whey
Ever wondered what Miss Muffet was chowing down on while that spider was sliding up beside her? Yeah, curds and whey – sounds like a detective duo from a nursery rhyme noir. But let me tell you, it’s no mystery when it comes to the science of milk magic! Curdling milk is like a culinary caper, where you transform the liquid into a yummy solid. Now, let’s break it down, Sherlock style.
The age-old process of curdling milk
So, you’ve got this jug of milk, right? And you’re staring at it thinking, “How on earth do I get that to turn into delicious curds?” Well, my friend, it’s all about playing with the milk’s molecules. You add an acid or some enzymes, and those proteins in the milk just can’t resist clinging together. It’s like they’re having a party and everyone’s invited. But instead of mingling, they clump. That’s your curds, folks! The rest, that liquid part – that’s the whey.
- The science behind milk separation: It’s like this – milk is chock-full of casein and whey proteins. When they bump into a bit of acid or rennet (that’s the enzyme we’re talking about), they curdle faster than you can say “cheese!” It’s a reaction that’s been happening since the days cows first mooed.
- The role of acids and enzymes: Acids – think vinegar, lemon juice, or good ol’ buttermilk – they’ll get your milk to curdle quicker than a wink. But enzymes, like rennet, they’re the secret agents. They sneak in and create a smoother, more predictable curd. Perfect for making cheese that’ll have your taste buds going undercover for more.
Now that you’ve got the scoop on the curdling caper, you’re probably itching to pick your milk type, right? Well, let’s mosey on down to the next section where we’ll wrangle with the question of cow versus goat, and get the lowdown on fat content’s role in this curdy rodeo. Spoiler alert: it’s creamier than you think!
Choosing Your Base: Milk Selection
Well hello there, fellow curd connoisseurs! Let’s cut to the cheese: when you’re on a quest for the perfect curd, the journey starts with one critical decision – picking the right milk. Now, are you team cow or team goat? 🐄🐐
The foundation of creamy curds
- Cow’s milk vs. goat’s milk: Cow’s milk is your go-to for that classic, creamy curd we all know and love. It’s smooth, it’s rich, and let’s be honest, it’s everywhere. But hold your horses! Goat’s milk isn’t just for those fancy cheese plates. It’s tangy, it’s got personality, and it can give your curds a unique twist that might just knock your socks off.
- The impact of fat content on curds: And here’s the skinny on fat: more fat means creamier curds, period. So if you’re after curds that hug your spoon like a long-lost friend, reach for the whole milk. But if you’re watching that waistline, or you’re all about that firm curd life, skim milk might be your new best pal.
Now, don’t just stand there like a statue; let’s get moving! Because once you’ve picked your potion – I mean, milk – we’re on to the magical moment where it all comes together. And by that, I mean acidifying your milk to the land of curds and whey.
Acidifying Your Milk: Key Techniques
Stay tuned, folks, because next up, we’re diving into the world of vinegar and lemon juice – the unsung heroes of curdling. Trust me, you don’t want to miss out on the secrets to getting that curd just right. So grab your aprons, and let’s turn that milk into a curdle-wonderland!
Acidifying Your Milk: Key Techniques
Ever wonder how milk transforms into those glorious little lumps we call curds? Yeah, it’s not just about letting it sit out on the counter until it decides to separate like some kind of dairy divination. It’s about getting down and tangy with a little thing called acid. Now, buckle up, buttercup, we’re diving into the world of milk acidification, and it’s gonna be a wild ride!
So, what’s the deal with adding acid to milk, you ask? Well, it’s like sending an invitation to the curdle party. Acids like vinegar or lemon juice are the plus ones that milk never knew it needed. They jump-start the curdling process, making sure your curds come out to play.
- Vinegar, the old reliable, is a curd-curdling powerhouse. A splash of this potent potion can turn your milk into curds faster than you can say “cheese!” And the fun part? You can switch it up with apple cider or white vinegar depending on the flavor profile you’re after.
- Now, if you’re feeling zesty, lemon juice might be your acid of choice. It’s not just for tequila shots and lemonade stands, folks. This citrus squeeze brings a subtle tang to the curd scene, perfect for a fresh, light flavor.
But hey, not everyone’s into the quick and easy. Some like it slow and steady, which is where bacterial cultures come in. These little critters are the marathon runners of milk curdling, taking their sweet time but giving you complex flavors and textures that are worth the wait. Just remember, patience is a virtue, especially when it comes to cheesemaking.
Now, don’t go pouring acid willy-nilly into your milk and expecting magic. There’s a method to this milky madness, folks! You gotta introduce your acid real slow-like, teasing the milk, building up the anticipation. It’s a culinary flirtation that ends in the delightful separation of curds and whey.
The Art of Curdling Milk
Next up, we’re gonna channel our inner milk whisperers and get all cozy with the temps and times of perfect curds. Stay tuned, cause we’re about to turn up the heat on this curd-crafting adventure!
The Art of Curdling Milk
So, you’re ready to dive into the fascinating world of curdling milk, are ya? Well, buckle up, buttercup, because we’re about to get into the nitty-gritty of transforming your plain ol’ milk into curdled delight. Now, don’t let the term ‘curdling’ scare ya—it’s not rocket science, but there is a bit of art to it!
Temperature Nuances for Perfect Curds
First off, let’s talk about heat. Not too hot, not too cold—just like Goldilocks, we’re aiming for ‘just right’. The trick is to warm your milk gently to the ideal temperature. Think of it like a warm bath for those future curds. Get it too hot, and you’ll end up with a hot mess (literally). Too cold, and your milk will be chillin’ like a villain instead of doing its curdy thing.
- Whole milk? Aim for around 85°F to 90°F.
- Using cream? A cozy 75°F will do the trick.
And hey, if you don’t have a fancy thermometer, just test the water—er, milk—with your clean finger. If it feels like a comfy warm bath, you’re in the zone!
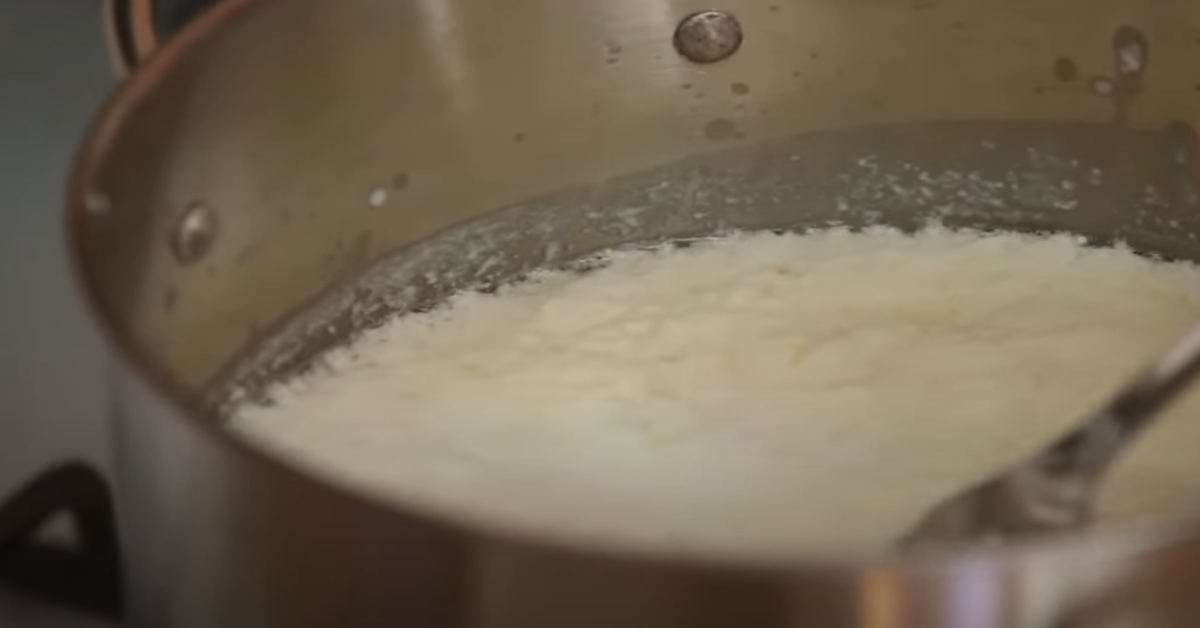
Watching for the Curd’s Separation
Once you’ve got the milk all nice and toasty, it’s time to add your acid or rennet and then… wait for it… the magic happens! Keep an eye out for the curd to pull a Houdini and separate from the whey. It’s like a culinary magic show in your pot! The curds will be the milky, solid bits, and the whey will be the liquid hanging out around them.
Remember, patience is key. Don’t rush the process or you’ll be cryin’ over split milk (sorry, couldn’t resist 😂). Give it time and keep the faith—it will happen!
Now, if you’re curious about what to do with all that lovely leftover whey, check out this gem of an article on repurposing it. Waste not, want not, am I right?
Alright, we’ve covered some ground on curdling milk. Next up, we’ll be wading through the whey—literally! We’ll chat about how to drain that liquid gold without losing a single precious curd. So, stick around and keep your cheese cloth handy!
Draining the Whey: A Delicate Balance
Okay, so you’ve got your milk all curdled up, looking like something outta ‘Little Miss Muffet’s’ snack time, right? Now, we’re about to get into the nitty-gritty – draining the whey, folks. This isn’t just about separating the curds from the whey; it’s making sure you hang on to the good stuff without letting any of those precious curds slip through the cracks – literally!
Preserving the Precious Whey
First off, let’s talk equipment. You don’t need some high-falutin’ gadgetry here. A simple cheesecloth or a fine-mesh strainer is your best bud when it comes to whey-draining, but hey, if you’re in a pinch, a clean kitchen towel over a colander will do the trick too. Oh, and don’t you dare chuck out that whey! It’s liquid gold, packed with protein and perfect for smoothies or even fermenting veggies.
- Pro Tip: Gently ladle your curds into your straining apparatus. No rush, we’re not making curd smoothies here.
Tips to Avoid Losing Curds During Drainage
You’ve got your strainer set, the curds are coddled on top, and now comes the patience part. Like watching paint dry, but way more delicious, eh? And remember, you want to treat these curds like they’re the crown jewels. Agitating them too much? That’s a no-no – you risk pushing those soft lil’ curds through the strainer, and there goes your hard work down the drain, literally! So, a word of advice: let gravity do its thing. This is why I always say, “Drain, baby, drain, but with tender love and care.”
“Remember, good things come to those who wait. Let those curds take their sweet time; patience is a virtue, especially in cheese-making.” – Cheese Guru
Letting your curds sit undisturbed isn’t just about not losing them; it’s also about achieving the right moisture balance. Too dry? Your curds will crumble like ancient ruins. Too wet? Welcome to Soggytown, population: your cheese. Finding that balance is key. And talk about versatile – that whey you’re collecting can be a secret ingredient in bread baking, giving it that lovely, subtle tang … 🤤
By the way, if you’re a little antsy and want to ensure every single curd remains intact, you can even line your strainer with a double layer of cheesecloth. Sure, it’ll take longer to drain, but trust me, it’s worth it when you’re going for that Blue Ribbon at the county fair.
As we’re chatting about the natures subtle cues, be on the lookout for my next section where I’ll be diving into Refining Curds for Premium Texture. Because there’s nothing quite like the feel of a perfectly textured curd, am I right? Now go on, get draining that whey, and stay tuned!
Refining Curds for Premium Texture
So, you’ve got your curds all cuddled up from the milk – great job, bud! But hold your horses, ’cause we ain’t done yet. The magic’s in the refinement, and that’s where we sculpt those curds into something smoother than a sea lion in a silk suit. It’s all about the texture!
First up, the cut is crucial. Why? ‘Cause those curds can be as moody as a teenager – handle ’em wrong, and they’ll sulk. But cut ’em nice and gentle, with patience like you’re fishing, and you’re golden. The size of your curd cut can’t be as random as your Aunt Carol’s casserole recipe; it affects how much moisture gets to say sayonara. Smaller curds? Dryer cheese. Bigger cubes? More moist. Hey, it’s your dairy canvas!
But the party doesn’t stop there. After the cut, it’s time to kick those curds in the rinse cycle – and no, not the one you forgot your socks in. Rinsing curds is like telling them the coast is clear after a storm – it calms ’em down, washes away some of the whey, and preps them for future flavor fusion. Just remember, we’re making cheese, not a puddle, so go easy on the water.
Now, for the grand finale – the drying phase. This is where you gently, and I mean gently, press those curds like a grape expecting to become fine wine. This isn’t nap time though, keep an eye out to ensure they don’t over-press – we ain’t making curd pancakes here!
- Size matters when cutting curds – think precision, not guesswork
- Rinsing curds is like a spa treatment; indulge them lightly
- Gentle pressure can make or break the final curd texture
And here’s a kicker: did you know reheating cheese curds in an air fryer can bring back some of that glorious squeak we all love? If your days of fresh curds have ticked by, that’s a trick to bookmark for later.
Moving on, we’re almost at the finish line, but it’s not over yet. Next stop? We’re diving into the big, bold world of seasoning, where the right pinch of salt can take your curds from blah to voilà! Stay tuned, cheese champs – flavor town awaits!
A Symphony of Flavors: Seasoning Curds
Alright, cheese fans, let’s sprinkle a little fun into this curd convo! Ever wonder how curds get that lip-smacking good taste? It’s all in the seasoning, my friend. 🧀✨
We’re not just talking a pinch of salt here and there. Nope, there’s an art to turning those plain Jane curds into the life of the cheese board. So, let’s dive in!
Pass the Salt, Please!
First off, salt isn’t just the secret weapon for making your curds taste amazing. I mean, sure, it ramps up the flavor like nobody’s business, but it’s also a preservation pro! Salt helps keep the bad bacteria at bay, which means your curds stay fresher, longer. Pro tip: Use non-iodized salt to avoid any funky flavors.
- The Right Amount: Too little and it’s “meh,” too much and it’s “bleh.” Finding the Goldilocks zone of salting your curds is key.
- Incorporate Evenly: We want that flavor in every crevice, so mix like you mean it. Uniformity is your buddy.
- Timing is Everything: Add salt after you’ve drained the whey but while the curds are still warm. They’ll absorb the salt easier that way.
Herb it Up!
Now, if you’re feeling adventurous, why not jazz up those curds with some herbs and spices? Chives, dill, or even some fiery pepper flakes can catapult your curds from “so-so” to “sooo good!” 😋
“Cheese without herbs is like a hug without a squeeze!”
– Some Wise Cheese Guru
Remember:
- Quality Matters: Fresh is best. Dried will do. The better your herbs, the tastier the outcome.
- Thickness Counts: Finely chopped or ground won’t overpower the delicate texture of those curds; too chunky and you’ll get a mouthful of “what was that?”
The Taste Test
And don’t just take my word for it! Get in there and taste as you go – your palate’s the best tool you’ve got. Adjusting on the fly? That’s the spirit of a true curd curator!
| Ingredient | Amount (per 2 lbs of curds) |
|---|---|
| Salt | 1-2 tsp |
| Chopped Herbs | 2-3 tbsp |
| Crushed Red Pepper | 1-2 tsp (if you dare!) |
As you sprinkle, mix, and taste, let the magic happen. And hey, don’t forget to share your curd creations on Insta – because if you don’t post it, did it really happen?
Alright, enough chit-chat about flavor town. Let’s move on and tackle another cheesy adventure, shall we? Onward ho! 🚀
FAQs: Demystifying Curds and Whey Creation
Alright folks, pull up a chair and let’s crack the code on some of the cheesemaking world’s biggest head-scratchers. You asked, and I’m ready to dish out all the dairy details!
Can I make vegan curds and whey?
Oh, you betcha! If you’re plant-based and feeling left out of the curd convo, don’t fret. Soy milk is your new BFF. Now, it’s gotta be the good stuff – none of those fillers or sweeteners, just pure, unadulterated soy milk. Add in your favorite acid (lemon juice or vinegar does the trick), and bam! Vegan curds coming up. The liquid that’s left behind? That’s your vegan “whey.” Just a heads-up, it won’t be exactly like the dairy deal, but hey, it’s darn close!
How can I use leftover whey?
- Soup’s up! – Swap out broth with whey in your next soup adventure. It adds a tangy zip you never knew you needed.
- Power up your plants – Feed your ferns or begonias with whey; it’s like a protein shake for your greens. Just dilute it with water so you don’t overload them.
- Boost your baking – Use whey instead of water in bread recipes for that elusive, ‘what’s their secret?’ taste.
There you have it, the lowdown on vegan curd concoction and putting that liquid gold, aka whey, to work. I’m tellin’ ya, it’s like finding out you’ve got hidden treasure in your fridge! Be bold, be brave, and get those curds a’splittin’. Thanks a heap for swingin’ by, and remember: In curds we trust, all whey! 😄🧀
Overall, creating curds and whey, either the traditional or vegan way, is a fun kitchen experiment that’s totally doable. Who doesn’t love a little culinary magic? The best part? You end up with more than just tasty curds – you get a whole world of culinary possibilities with that leftover whey. So what are ya waiting for? Get in there and whip up some dairy (or non-dairy) delicious! Thanks for reading, and stay cheesy, my friends! 🌟